Wood spindles or balusters on this curved staircase add a simple elegance to the home. In a compact space the builder was able to create an attractive design. One of the most important elements of this open stairwell are the variation they chose for the wood spindles.
Balusters and Wood Spindles Make the Design
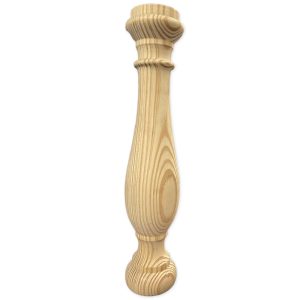
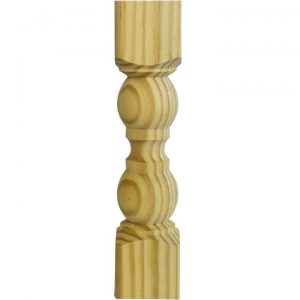
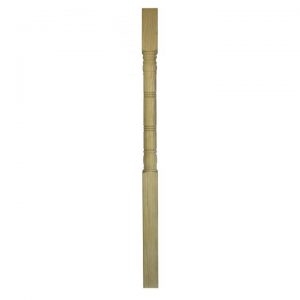
Although many spiral staircases are metal and welded together, it doesn’t mean the same structure can’t be made of wood. Turned spindles like the Colonial Spindles and Vintage Spindles have look amazing on winding staircases. These spindles come in Western Red Cedar as well as pressure treated lumber that is kiln dried after treatment (KDAT).
Western Red Cedar is naturally durable and although it’s typically used on outside projects, the unsurpassed natural beauty with the richly textured wood and deep, tonal properties make Western Red Cedar a modern approach to architecture. The rich texture of the warm cedar would make a great juxtaposition against the modern chandelier and ornate French wallpaper. Best of all, the light from the chandelier would cast a natural yellow tone that would highlight the undertones of the cedar.
Risers are Key to the Perfect Spiral
Building magnificent curved staircase isn’t as difficult as one might expect. Whether you want to build freestanding curves, squares, or ones with a curved wall as the outdoor radius, the most important fact to know is that it’s still all around the rise and run while getting the layout squared away properly that matters most.
Curved stairways have two rise and run layouts. The one that’s on the inside, and the one that’s on the outside stringer. Simply decide on the number of risers as dictated by the local building inspector. Then measure the distance from one floor to the next. Divide the distance between the floors by the number of risers needed.
Once the number of risers is determined, think about the size and location of each tread on the stairwell. Add about a 14 ft chalk line to the floor from the back edge of the top tread on the second. Determine the stairwell’s pivot point and then determine the radius from the inside wall.
Set trammel points to clamp the stair tread and determine the radius for the inside wall. Determine the tread layout which is where the front of each riser will end up. It’s easiest to build a curved wall and put steps inside it than it is to laminate a stringer, building the wall, and then cut steps in the stringer. The curved wall will tell you where to cut the stringer on each step.
Don’t be surprised if you need to make a couple of cuts to determine the lengths and angles you’ll need on the spiral staircase. Once that’s determined, cut wedge-shaped pieces of wood for the whole stairway. Simply line up the treads on the stair with the chalk lines for the risers. If working with an outside wall, add a curved skirt board with glue and nails, and plow pockets into it. Then support the treat by gluing on a cleat. Finally, nail the temporary treads down, and add a rail for safety.
How to Prepare Western Red Cedar Balusters and Spindles for Curved Stairwells
To use Western Red Cedar on your curved stairwell, consider giving the wood time to settle by placing it in the room where it will be used.
Use 120 grit sandpaper to buff away imperfections and then follow it up with 180-grit paper or finer. Sand with the grain and make sure to clean up all dust and debris before finishing. Tack cloths and vacuums make fast work and prepare the cedar for finishing.
Apply the desired finish including stain or polyurethane without goop, drips, and runs by working at the top of the curved staircase and coming down one tread at a time.
Allow the finish to dry without interruption and make sure to cover the spindles and balusters first if you’d like them included, otherwise the paint, stain or varnish can end up on the stair treads. Brush the stain in to emphasize the grain before applying a clear top coat finish.
Some people prefer just to use a clear finish to bring out the rich tones of the Western Red Cedar. Others who prefer pressure treated wood that has been kiln dried after treatment may prefer a stain and finishing coat or paint.
A topcoat will protect the curved stairwell from damage, moisture and stains. Clear polyurethanes come in either water-based or oil-based formulas. The oil-based ones give you longer time to finish the stairs.
Once it’s dry, keep it looking as magnificent as the day you installed it by using a soft or vacuum as needed. Clean it periodically with homemade wood cleaner. Mix ½ cup mineral oil, ¼ cup of vinegar, 20 drops of lemon oil and 1 cup of water to keep it sparkling. Teak and linseed oil work best for finishing. It’ll keep your project looking warm, natural, and hand rubbed.
Simple Balusters and Wood Spindles Allow Geometric Design to Take the Forefront
The blueprint of these triangular shaped stairs makes great use of a tight space while adding lots of drama. Consider adding one to your next project using simple wood elements. It’s an excellent option when there isn’t enough room for a straight run stair but when the beauty of geometry should come to the forefront. It’s striking, functional, and looks like Yale University’s Art Gallery which was designed by Louis Kahn in 1953. A triangular stairwell is a modern take on a classic architectural style. Looking down you’ll notice that the center reflects a triangular pattern and lines of the exterior and acts as a sculpture. To create this structure, it’s important to imagine the stairs circulating downward within a circular structure.
Using a program like Archicad, Kahn could design a perfect circle. From there he could calculate the distance, angle, length and height to transform it into triangular stairwell. He could determine the number of steps per flight as well as the riser height and number of risers needed to complete the level. Rounded nose bull front stair treads are helpful. They’ll resist bowing and cupping, keeping the triangular stairwell erect. Kahn could then subtract the distance around the outside perimeter of the circle, calculate the distance and angle, and raise an arch so the triangle shaped stairwell fit within the area. He determined the tread height and length and set the stair profile. He added lead beams and beams to the trail end. Once modeled singularly, the elevation could be repeated. The triangular design would spread upward making three copies of the structure. It stood 1,215 feet high. The stairs are fashioned in a triangular format where the ends are rounded. But the work, emphasized by repeating geometry in artful proportion, makes this stairwell memorable.
Pick Simple Balusters and Wood Spindles for a Modest Complement
Rails, balusters and or spindles are selected to begin to finish the look and multiplied in the CAD program until it reaches the same elevation.
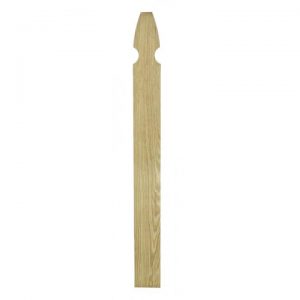
Simple balusters incorporating Plain Spindles complement the intense geographic shape.
The proper distance and angles are calculated to make sure the rails will fit securely in place. Consider adding a molded handrail to this triangular shape. Wood is a fantastic material that ages gracefully. Moulded handrails come in pressure treated pine that has been kiln dried after treatment and Western Red Cedar and are simple to install.
These stairs are a place to value creativity and ingenuity and simple details that make the design unforgettable.
Simple Closed Half Landing Stairs with Simple Wood Stair Treads

Stair treads are important in U stairs. It’s important to find treads that resist twisting, bowing and are also easily installed. A simple stair tread with a rounded bull nose on the front leaves a beautiful finish. The bull nose front also makes the stairs more visible and improves the safety of the stairwell.
Stair nosing comes in a variety of materials including wood, brass, rubber, bronze and PVC. It serves special functions: most building codes require it in industrial, municipal and commercial stairs but it also enhances aesthetic appeal.
Stair Tread with Bull Nosing Benefits
Most importantly the bull nose keeps people safe because it helps prevent falling. It’s tough to look past how monotonous steps can look as you’re walking up and down. Depth perception can be tricky for some people. A stair tread helps to define the step, so people know where to place their feet. In turn, it helps prevent falls.
Stair treads with bull nosing also help stairs remain durable. The nose will take the wear and tear over the steps, so it is designed to withstand impact without warping, cupping or twisting. Because the stair nose takes the beating it allows the stairs an extra layer of protection from normal wear and tear. It helps the steps last longer than they would without any protection and it enhances the look of the stairwell while adding value to the property.
Cliff Side Stairwell Stuns with Ornate Wood Spindles
This cliff side winder staircase offers a variation of the quarter landing staircase. However, this doesn’t have a flat landing. Rather the steps have a triangular shape or pie for the corner transitions. This winder design can be used when there isn’t enough room for an L shape staircase.

Although the design is remarkable because it is on the side of a cliff, this stairwell was constructed in a space that requires less area than other stairway opportunities. Plus, the visual appeal from the landscape to the man-made architecture is spell bounding.
These stairs may be tricky to navigate in part because of the expansive view before it may cause some people to be skittish about walking on it, but also the handrail construction can be a challenge. Since handrail construction can be tough, simplify the project with a New England Handrail.
Handrails from S&L Spindles come in Western Red Cedar and Pressure Treated Pine that has been kiln dried after treatment to work well in the outdoors and within. These easy-to-install rails can be used on the top and bottom and don’t require a screw in the top. This saves time and allows the most artful piece of this project to shine.